Friday, April 30, 2010

Destination of the Week...

Maroantsetra, or “many spears,” is an average-sized city on the Northeast coast of Madagascar. It is situated between the bay of Antongile and the lush tropical rainforest. Despite the issues and political unrest that plague Madagascar, Maroantsetra remains peaceful, with a sleepy vibe and friendly atmosphere. With the crashing waves of the Indian Ocean, and the fragrance of vanilla, cloves, and other harvested spices, blowing through the warm, humid air, this place offers complete serenity. Sadly, forest degradation is destroying much of Madagascar, but Maroantsetra is home to Masoala National park, which is regarded as the largest protected area in the country. Here you can truly experience untouched Madagascar, and catch glimpses of its unique animal species, like the Red Ruffed Lemur, Leaf Tailed Gecko, and the Aye Aye. For an even more dazzling spectacle of wildlife, and to learn about the areas history, head out to the small island of Nosy Mangabe, located 3 miles (5 km) from the coast. Those who really want to feel at one with the environment can camp for a few nights on this island nature reserve, and walk amongst the diverse plant life and Antimaroa clan tombs. Though many travelers do visit Maroantsetra, in remains “un-touristy” and is a must for anyone to experience.

To get to Maroantsetra, there are several options, depending on how much adventure you’re seeking. Flying is one way to arrive, but for the biggest thrills you can drive along the treacherous, yet scenic coastal highway. Or, if you’re leaving from Tamatave, try cruising your way in a small wooden boat, known as a “boutre”. No matter how you get to the city of “many spears”, you will come away with a genuine appreciation of Madagascar and all it has to offer.

Click here for Madagascar visitor information!

Use our helpful links to plan your trip to Madagascar!

Photo of the Day...


Koa Phagnan, Thailand. Photo by: Neil Carlin

Do you have a great photo you want to share? If so let us know! We'll post some favorites for everyone to see!

Thursday, April 29, 2010

Photo of the Day...


Auckland, New Zealand. Photo by: Sarah Leech

Do you have a great photo you want to share? If so let us know! We'll post some favorites for everyone to see!

Dirty Little Secrets...

FOOD FIND
Mochi is a Japanese sticky and chewy sort of rice dough, with a mild flavor. It is basically soaked, steamed sweet rice that has been pounded with a mallet, into a smooth mass, and formed into little “cakes”. It is best eaten fresh, but can be air-dried or frozen for later use. Mochi making traditionally takes place before the Lunar New Year, and the mochi is made into an ancient New Year’s decoration. However, mochi is becoming so popular today that it’s made in many parts of the world, all year round. It can range from being shaped into a simple bun, to complex designs decorated with fruits or flowers, which is the most common form when being exchanged as a gift. Mochi is eaten as both a sweet and savory food. The flavor is so mild that it can almost be eaten with anything. When consumed in its soft form, it is commonly combined with shredded daikon (Japanese white radish) and seasoned with soy sauce and lemon. As a confection, mochi can be eaten with a sweet condiment like kinako (roasted soy bean “flour” mixed with sugar), or flavored with a myriad of sweetened seasonings. In another form, mochi cakes are filled with sweetened red bean paste, or other ingredients. Sometimes the air-dried mochi is roasted over a brazier before being added to soups, or dipped in a mixture of soy sauce and sugar. Mochi can be eaten in so many forms, it is almost impossible to list them all. It can be grilled, dipped, stuffed with pickled vegetables, or just about any other method one can think of. In many parts of the world, mochi ice cream has become hugely popular, and can even be found in major grocery stores. For this frozen treat, the mochi is filled with ice cream, such flavors as green tea, strawberry, and mango. It is then dusted with sweet rice flour. Each piece is about the size of a golf ball, but the sizes do vary. Mochi can be used in endless ways, and is filling, making foods with mochi a great snack for the budget traveler. It is also relatively easy to make at home, so try out the below recipe, and find your favorite way to eat it! Just be careful, mochi can be so sticky that some people joke about it being a choking hazard!

Ingredients

1 cup mochiko sweet rice flour (glutinous rice flour)

1 cup water

1/4 cup sugar

Katakuriko, for dusting (potato starch)

Directions

• Mix mochiko and sugar in a bowl.

• Add water and mix thoroughly (Will be watery).

• Put in a microwaveable dish. Cover with plastic wrap.

• Microwave on high for 4 minutes. Take off plastic wrap. Cool for a few minutes, if you want. Cut. Serve.

• Opt. Dust with katakuriko or kinako to prevent mochi from sticking everywhere. If you don't have these, you can just put the mochi on cellophane.


Variations for Filling: You can add red bean paste, ice cream, chocolate, etc. in the middle if you want BEFORE you dust. add a teaspoon of filling and pinch edges closed.

Variations for Dough: Add a few drops of food coloring into batter for color variation. A few drops of flavoring (strawberry, grape, orange, blueberry, etc.) may also be added. >> For chocolate flavor, stir about 1/4 cup melted chocolate chips into mochi batter before cooking.

*Photo from facebook.com

*Recipe from recipezaar.com

Wednesday, April 28, 2010

Written for the Road...


LIFE OF PI is a travel book for the imagination. The story follows Pi Patel, a 16 year-old son of a zookeeper, who is not your typical teenager. Pi is a worldly young man who follows three different religions. The story begins in Pondicherry India, but everything changes when Pi’s family decides to move to Canada. Aboard a huge barge with various zoo animals, the family sets sail for North America. Along the way, the barge sinks in the middle of the ocean and Pi finds himself stranded on a small lifeboat with a wounded zebra, a spotted hyena, a seasick orangutan, and a 450-pound tiger named Richard Parker. After much infighting, Pi and Richard Parker are the sole survivors on the lifeboat. For over 200 days in shark-infested waters, the characters struggle through starvation and hallucination, and rely on faith to survive. It is at this time, the reader lets go of the fantasy plot and imagination takes hold.

I read LIFE OF PI while traveling in Thailand. Up to now, this book has been the best read I have received from another backpacker in a book exchange. If you haven’t read the book, check it out! Click on the link below to purchase.

Happy Reading.


Photo of the Day...


Berlin, Germany. Photo by: Stuart Bernie

Do you have a great photo you want to share? If so let us know! We'll post some favorites for everyone to see!

Tuesday, April 27, 2010

Photo of the Day...


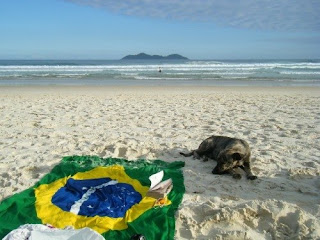
Ilha Grande, Brazil. Photo by: Jamie Meecham

Do you have a great photo you want to share? If so let us know! We'll post some favorites for everyone to see!

ANNE SOPHIE SWETCHINE is a DIRTY HIPPIE


"Travel is the frivolous part of serious lives, and the serious part of frivolous ones."

-- Anne Sophie Swetchine

Monday, April 26, 2010

Hostel of the Week...


THE SANT JORDI SAGRADA FAMILIA is comfortable accommodation located in the outskirts of beautiful Barcelona. The rooms here are apartment style, which makes for a more private alternative to your typical hostel. The apartments come in single, double, and four bed rooms; each has a kitchen, living room, laundry room, balcony, and television. In addition to great rooms, the hostel has a friendly staff that will help you make the most out of your visit to Barcelona. The neighborhood around the hostel is incredibly safe and also offers a variety of cafes, restaurants, and markets. Since the apartment has a kitchen, why not cook in your room? For those who have come to Barcelona to experience the nightlife, join the Saint Jordi staff for an organized trip to a popular nightclub or restaurant. Musician? Ask the front desk for use of their guitar. There are so many upsides to the Sant Jordi that the only downside may be its location. It is about a fifteen-minute metro ride into the center of town. But when you consider what you gain in security and overall feel of the Sant Jordi Sagrada Familia, you wont mind the commute into town the least bit.

Three reasons to stay at the SANT JORDI SAGRADA FAMILIA:

  1. The rooms. Since you are staying in apartments–– by the time you check out–– you will have felt as if you have lived in Barcelona rather than just visited.
  2. Safety. Let’s be honest––Barcelona is a big city and could be dangerous. Being in a quiet neighborhood, in the outskirts of town is just a better alternative.
  3. Great staff with hospitality. St. Jordi has a “hotel” feel at a hostel price.

Photo of the Day...


Amsterdam, Netherlands. Photo by: Stuart Bernie

Do you have a great photo you want to share? If so let us know! We'll post some favorites for everyone to see!

Sunday, April 25, 2010

JOHN HOPE FRANKLIN is a DIRTY HIPPIE


                                                    -John Hope Franklin

Photo of the Day...


Goa, India. Photo by: Natalie Isaia

Do you have a great photo you want to share? If so let us know! We'll post some favorites for everyone to see!

Saturday, April 24, 2010

Photo of the Day...


Delhi, India. Photo by: Elizabeth Gray

Do you have a great photo you want to share? If so let us know! We'll post some favorites for everyone to see!

Friday, April 23, 2010

Destination of the Week...

The small village of Moni is on the island of Flores, Indonesia, also known as “Cabo Da Flora”. This settlement itself may not encompass too much excitement, but the natural wonders surrounding the area make it well worth stopping here for a few days. Indonesia is one of the world’s most geologically active countries, and here in Moni, you can experience this first-hand. Most people find themselves in this small town, using it as a stopping point for visiting the famous Kelimutu Crater Lakes, which are considered by the people of Indonesia to be the national treasure of the country, and are even featured on the 5,000 rupiah bill. These three lakes are set deep in craters near the summit of Kelimutu Volcano, and the best part is that the lakes change colors. Tiwu Ata Mbupu (Lake of Old People) is usually blue, while the other two, Tiwu Nuwa Muri Koo Fai (Lake of Young Men and Maidens), and Tiwu Ata Polo (Bewitched or Enchanted Lake), are typically green or red in color. From bright turquoise to pink, to deep black, local beliefs and stories explain why the waters change, but scientists liken the cause to minerals and gases. The best time to visit the lakes is in the early morning, so that you can watch the sun rise higher and higher in the sky, reflecting off the bodies of water. Most people hire a car or collective truck to reach the summit, which takes one hour, plus a 30 minute walk from the road to the rims of craters, and then take the three hour scenic walk back to town. It is a long walk back, but after such spectacular views of the lakes, you probably won’t mind soaking up some more natural beauty and strolling through the gorgeous villages. While the Crater Lakes would be reason enough to stop in Moni, there is more to do. Moni also has beautiful hiking trails, hot springs, and great local culture, all amidst the natural beauty of Cabo Da Flora. Plus, you can head to some of the surrounding cities to snorkel in the underwater gardens, see artifacts from an ancient hominid civilization, and a variety of other unique activities to keep any traveler busy.

There are a few different ways to get to the island of Flores, including ferries and flights from Bali. Once on Flores, you can take a minibus to Moni, from Ende, Labuanbajo, or Maumere, which will take longer, but will be less expensive than renting a jeep. Most of the accommodation options in Moni are guesthouses, where you will also be treated to, cheap, home cooked meals. Since Indonesia is still a great place for the budget travelers’ wallet, you might as well spend a day or two in this town and simply relax.


Use our link list to help you plan your trip to Indonesia!

Photo of the Day...


Cuenca, Equador. Photo by: David Paul Edwards

Do you have a great photo you want to share? If so let us know! We'll post some favorites for everyone to see!

Thursday, April 22, 2010

Dirty Little Secrets...

FOOD FIND
Labneh, also known as labni, lebni, kefir cheese, and a few other names, is a soft cheese made from yogurt. It is hugely popular in The Middle East and is originally from Lebanon. Labneh is nothing more than yogurt that has been strained, and the excess liquid (whey) removed. The longer it is hung to strain, the thicker the cheese. It is traditionally made with goat’s milk, or even sheep’s milk, but the more popular it becomes the more variations there seem to be. In The Middle East, labneh is served as a condiment, mostly for dipping and spreading on breads. It is most commonly served in a small bowl with a well of extra virgin olive oil in the middle, and sprinkled with fresh herbs, such as mint. If hung for extra long, the labneh can be rolled into balls and preserved in olive oil. This cheese is smooth and creamy, with a tangy, fresh flavor. While it is mostly eaten as part of a savory meal, it can be used as a sweet also, with honey, raisins, walnuts, etc. Labneh is light, refreshing, and a perfect ingredient for a budget traveler to make a meal of! Labneh is not only delicious and addictive but, like other cultured dairy foods, it can also be beneficial to your health. It is rich in Probiotics (good bacteria), which help keep your immune system strong, and is a good source of calcium, protein, and vitamins. Labneh is becoming more and more popular all over the world, and can now be found in many restaurants and grocery stores. However, it’s probably easier and more budget-friendly to just make it yourself! Experiment with your favorite yogurt, or follow the directions below. Enjoy!


Equipment Needed for Preparing Labneh:

Cheesecloth or Butter Muslin

A strainer or fine mesh sieve

A bowl on which to rest your sieve

A large, thick rubber band (optional)

A hook (optional)

Labneh Ingredients

1 Quart to 1/2 Gallon of Fresh Yogurt

1/2 Teaspoon Unrefined Salt per quart of yogurt

Extra Virgin Unrefined Olive Oil (optional)

Herbs (optional)

Labneh Instructions

1. Set your sieve above your bowl.

2. Fold the cheesecloth into quarters and set it inside the sieve.

3. Mix yogurt with unrefined sea salt.

4. Pour the yogurt and salt mixture into the sieve lined with cheesecloth. The initial straining will happen quickly as the bulk of the liquid and some of the yogurt itself will strain through the cloth and sieve into the bowl.

5. After the initial straining (5 - 10 minutes or so), gradually and carefully fold the ends of the cheesecloth in toward the center and twist them gently into a nice, tight package of yogurt that can easily hang from a hook.

6. Tie the package together with a rubber band and hang it from a hook, placing your bowl beneath to catch any dripping whey. If you do not have a hook set up, you can tie off the package and leave it in your strainer provided you watch the level of the whey, ensuring it never reaches the strainer. Hanging from a hook speeds up the straining process.

7. Hang your yogurt for at least 12 hours and preferably 18 – 24. The longer you hang the yogurt, the thicker your labneh will be.

8. After your yogurt has hung for a sufficient period of time, remove it from the hook and gently take off the cheesecloth. You’ll find that the yogurt is smooth and thick like cream cheese.

You can store the yogurt in small mason jars in the refrigerator or store them in olive oil with herbs.

To store labneh with olive oil, roll the labneh into small walnut-sized balls and gently place them into a mason jar with fresh herbs. I like to use violetta basil, but you can use any herbs that suit your preference. Cover them with oil. I have read that labneh can be stored this way at room temperature, but I store labneh in the refrigerator.

Store your whey for later use:

Remember: Preparing labneh at home leaves you with ample whey, which is strained away from the semi-solid cheese. This whey is similarly rich in beneficial bacteria and as such is slightly acidic. Don’t throw it away; the thin faintly green-looking liquid is quite valuable. You can use it to soak grains to render them more digestible, in bread baking, as a starter for fermented foods and in smoothies for extra protein and probiotics. Whey should keep, refrigerated, for up to six months. We usually use ours within two weeks.

*Photo from recipearchive.com

*Recipe from nourishedkitchen.com

Photo of the Day...


Alaska. Photo by: Mark Gutteridge

Do you have a great photo you want to share? If so let us know! We'll post some favorites for everyone to see!

Wednesday, April 21, 2010

Photo of the Day...


The Amazon, Ecuador. Photo by: Stuart Bernie

Do you have a great photo you want to share? If so let us know! We'll post some favorites for everyone to see!

Written for the Road...


FEAR AND LOATHING IN LAS VEGAS is the ultimate dirty-hippie road trip book. Set in the tail end of the flower power generation, Fear and Loathing shows the reader how if you take "two bags of grass, seventy-five pellets of mescaline, five sheets of high-powered blotter acid, a salt shaker half-full of cocaine and a whole galaxy of multicolored uppers, downers, screamers, laughers.... A quart of tequila, a quart of rum, a case of Budweiser, a pint of raw ether and two dozen amyls," you can see the American dream and be rudely woken up from it. Hunter S. Thompson penned the novel in 1971, and his words still hold true to this very day. “Buy a ticket and enjoy the ride,” said Thompson, to wrap up the novel. In this case the ticket is his masterpiece.

FEAR AND LOATHING IN LAS VEGAS is one of my favorite books of all time. Just the thought of this book makes my heart beat faster and my blood pressure skyrocket. What more is there to say?


Tuesday, April 20, 2010

Just a Thought...


If you could travel anywhere that is currently considered unsafe, where in the world would you go?

We look forward to your posts!

Photo of the Day...


Cococacabana, Rio de Janeiro. Photo by: Natalie Park

Do you have a great photo you want to share? If so let us know! We'll post some favorites for everyone to see!

ROBERT FROST is a DIRTY HIPPIE


"Two roads diverged in a wood and I – I took the one less traveled by."
— Robert Frost


Monday, April 19, 2010

Photo of the Day...


     Paris, France.  Photo by: Paul Holjak

Hostel of the Week...


The Times Hostel is a brand new hostel, located in the heart of Dublin, Ireland. The hostel is known for their friendly staff, and simple rooms at a great price. The amenities at The Times hostel include free WiFi, free 24-hour luggage storage, and free phone calls to 40 countries! All rooms are ensuite, and there is a complementary breakfast served every morning. This hostel also has an above average kitchen to prepare all your meals. But the best part about the hostel may be its location. The Times hostel is located next to Doyle’s Pub and Bowes Pub, two infamous spots in Dublin­­–– great for those Dirty-Hippies that stumble on home after a night out. The Times is a simple place to stay at affordable prices. Nothing fancy here. What you see is what you get.

Three Reasons to stay at THE TIMES:

  1. Comfortable beds. Those who have been on the road for great lengths will appreciate that.
  2. Friendly Staff.
  3. Location, Location, Location.

www.thetimeshostel.com


Sunday, April 18, 2010

Photo of the Day...


      Rio de Janeiro, Brazil.  Photo by:Eric Fieland

Saturday, April 17, 2010

WILLIE NELSON is a DIRTY HIPPIE


"On the road again
Goin' places that I've never been
Seein' things that I may never see again
And I can't wait to get on the road again."


-Willie Nelson

Photo of the Day...


Puerto Madryn, Argentina. Photo by: Heather Abel

Do you have a great photo you want to share? If so let us know! We'll post some favorites for everyone to see!


Friday, April 16, 2010

Destination of the Week...

Nimbin is a small town in New South Wales that is known as the “Alternative Capital of Australia”. To many backpackers though, it is known simply as the Amsterdam of the Southern hemisphere. Nimbin is a liberal community in the sub-tropical foothills of an extinct volcano, in the Rainbow Region of Australia. It is a society largely made up of artists, musicians, and… recreational drug users. While the drugs are not legal here, it doesn’t seem to lessen the use. Street dealers are anywhere and everywhere, and range from young adults to senior citizens. But, it is not necessarily the open use of drugs that makes Nimbin unique. What stands out is the relaxed, friendly, tranquil lifestyle of the helpful and inquisitive people. Residents of Nimbin take the expression “laid back” to a whole new level. So much that people seldom seem to know what day it is in this town! Nimbin is a perfect example of a society in which all are welcome. It shows that when communities work together, they can find creative, sustainable solutions to many environmental and socio-economical issues, that we face in all corners of the world.

Nimbin is located about one hour by car from Byron Bay, and is surrounded by communities where people live off the land amongst rainforests and waterfalls that are practically untouched by the modernity of urban life.


Click here for Australia visitor information!


Photo of the Day...


Buzios, Brazil. Photo by:Eric Fieland


Thursday, April 15, 2010

Dirty Little Secrets...

FOOD FIND
Brazilian Churros might be the most delicious things I have ever tasted. Just thinking of this warm, sweet, crunchy, gooey dessert has me drooling already. Yes, churros are originally from Spain, but countries all over the globe have come up with their own version, and believe me, you have not tasted a churro unless you have tasted a fresh one in Brazil. Churro vendors are all over the streets of Brazil with their carts, and often make churros fresh to order, lighting up the gas cooker right in front of you. The raw dough is piped through a syringe with a star shaped nozzle, turning it into a hollow, sort of stick doughnut. It is then deep fried until crispy golden brown, and rolled in cinnamon and sugar. The fried dough has a rigid texture, allowing the sugary coating to really get into the grooves and stick there until the very last bite. If that weren’t enough to entice you, the hot churro is then held upright and stuffed with, most commonly, a thick helping of dulce de leche, or sometimes chocolate. They are served in a paper wrapping and intended to be eaten immediately, while still warm. The good thing is that these chewy sticks of heaven usually cost just R$1.50, so you can enjoy as many as you want. The bad thing… these chewy sticks of heaven cost just R$1.50, so you can enjoy as many as you want! While in Brazil, I devoured so many of these, one would think that just hearing “churro” would make me sick but, quite the contrary. I crave them all of the time! Fresh off the street cart is by far the best way to experience the churro, but if you want to get an idea of what I’m talking about, try out the recipe below!


Ingredients:

1 cup water
2 Tbs brown sugar
1/2 tsp. salt
1/3 cup butter
1 cup white flour
2 eggs
1/2 tsp. vanilla extract
1/4 cup sugar
1/2 to 1 tsp. ground cinnamon, depending on taste

Directions:
Preheat 1 1/2 to 2 inches of vegetable oil in a 10 to 12 inch frying pan to 375 degrees F. In a separate dish mix the 1/4 cup sugar and cinnamon and set aside.
In a 3 qt. sauce pan add the water, brown sugar, salt, and butter and heat to a good boil. Remove from the heat and add the flour. Stirring in the flour will take some muscle. Mix it in until well blended. In a separate bowl, mix the eggs and vanilla together and then add this mixture to the flour mixture. Stir until well blended and all the egg is completely mixed in.
Fill your decorating tool with the churro recipe dough and attach the largest star tip you have.
Test your oil by placing a small amount of dough in it. The dough should bubble up right away or that means the oil is not hot enough and a soggy churro is on the way. Once the oil is hot enough, squeeze some dough (with decorator) into the oil about 4 inches long. I used my finger to release the dough from the decorator. Careful not to burn yourself.
You should be able to cook 4 or 5 churros at a time. Cook them about 1 minute and turn them over with a slotted spoon. Cook an additional minute or two. You're looking for that nice golden brown color. Remove the churros with the slotted spoon and place them on a paper towel-covered plate to absorb excess grease. While still warm, roll each churro into the dish with the sugar and cinnamon until coated.
To stuff the Churros hold one end upwright while they are still hot and with a second pastry bag or a large marinade syringe with a long narrow nozzle, inject the filler making sure the filler has a consistency that is easy to flow but still holds the shape of a drop for several seconds. Warm fillers tend to do better at that!

*Photo from farm4.static.flickr.com
*Recipe from domelt.blogspot.com